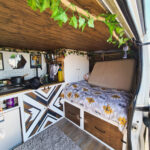

Taking on a DIY van build is no easy feat. There are 101 things to think about from what van you’re going to get to designing your ultimate layout. Although I’d love to help you with every aspect of your van build, I sadly can’t in one blog post. So, in this post I’m going to share my thoughts on what essentials you need to consider in your DIY van build. Make sure to read it all before cracking on with your van build.
This is all of course based on my opinion. I have lived in a DIY van full time since 2018, converted 6 and lived in 4 from a Vauxhall Vivaro to a Peugeot Boxer L3H2. Remember, everyone’s wants and needs are different so do what feels right for you.
You can grab my Van Build Costs and Build Process working document here for just £3.49.

1. Solar Panels
Although this list is not in priority order, I do think this is one of the most important features for a van lifer. Why? Because you get free electricity.
Having solar gives you the ability to wild camp as you don’t need to rely on the grid connecting to an electric hook up. Over the past 6 years living in my van, I have spent no more than £20 hooking up to the grid. And that is purely down to wanting to as I decided to stay still during the winter and game the night away.
For those completely new to how living in a van works, the reason why staying still plays a part in connecting to the grid is because I also rely on a battery 2 battery charger for power during the winter months. If I’m not driving, I’m not producing power and during the winter there is less sun.
So my next suggestion for your DIY van build is of course a B2B charger because having both, is what ultimately sets you up for self sufficient living in your campervan.
Click here to see the solar panels I use.

2. Battery to Battery Charger
A battery to battery (B2B) charger or split charge relay are practically the same thing. Both are essential for your van build and both pass on surplus power from your vehicles battery onto your ‘home’ leisure battery. You’ll need to check which one your van and batteries are compatable with.
As mentioned above, this gadget coupled with solar and the right electrics set up for you, you’ll be living off grid FOR FREE all year round. If you need any help with your electrics, we highly recommend Tiny Build Electrics who helped us with Dork (my van).

3. Security
Our vans mean the world to us! We spend so much time converting them into our tiny homes and for some of us who live in them, they’re even more vital so it would be awful if they got stolen.
Vans get stolen empty, mid van build and when complete so in my opinion it’s best to work on the security from the get go. Security can come in the form of pedal and wheel locks, dead locks, immobilisers, cameras and trackers. I’m going to share a few things I have experience with and recommend.
In my van, I have a wheel lock, tracker, dead locks and a Stop My Engine bluetooth immobiliser. The wheel lock and dead locks are for visual deterants, the immobiliser is to stop the van being moved and the tracker is for just incase the immobiliser fails me, I can and I will hunt them down!
The Stop My Engine works by connecting to my phones bluetooth. If my phone is not in reach of the van, it won’t start and it will start alarming. And yes, you can disable it for when it’s in the garage and you can set a secret override code in the event you loose your phone or it dies. If you’re interested in getting one for your van, you can save yourself 30% off using my code ‘NICROAMS30’. Personally, I think it’s a solid piece of equipment for just £158.
Similarly to my Stop My Engine immobiliser, you can also get a Ghost Immobilisers. This is what Sam has in his van. This one does not need to connect to your phone, instead, to start your engine, you need to tap in your chosen secret code. Another incredible bit of gear, it’s just 3 times the price.


4. A place for wet gear
In my opinion, there is nothing worse than wet gear in a van. It makes it humid and it takes up a lot of space to dry it out. Which is why I have added ‘a place for wet gear’ to this list of essentials to consider in your DIY van build.
For a lot of us, we have a campervan so we can spend more time in nature and more than most outdoors vs in the van looking out at it. Although, I do love those days too. Anyway, for someone who doesn’t enjoy rainy day adventures, mainly because of having to dry all the wet gear in a tiny space, I knew I had to come up with a solution. When I lived in a Vivaro, my only options was to hang coats on the back of the cab seats and the rest over the sink on an octopus hanger. It wasn’t really my ideal, just something I had to do.
I now have a larger van (Renault Master MWB) so I built a wet room to shower in but more so, to hang my wet gear in. When I get back from my adventures, I can hang everything in there and close the door so I don’t need to think about it. I have also found by creating a space for my wet gear, I’m not bothered about going outside and enjoying a rainy adventure anymore.

5. Ventilation
Ventilation is an absolute must in your van build as it is key to preventing mold and keeping the van fresh inside. You can get ventialtion in your van buy having sliding windows, roof vents or sky lights.
I opted out of having any type of ventilation on my roof in my Vivaro because I had twin sliding doors, one sliding window and no bulk head, which meant I could also use the front 2 windows. Basically, I thought I had more than enough ventilation but it turns out I didn’t. I regretted not having some for of vent on my roof.
When you’re cooking and the steam is going upwards, the simplest thing to do is open your roof vent. It was certainly an aspect I didn’t think through and for around £100, I should have just done it.

6. Access to the cab
Another essential! There ain’t no way I would ever NOT have access to the cab from the home section. I have now built 6 vans and each and every time it’s a must for security purposes.
Let me put it this way, imagine being parked up at night time and someone decides to start causing chaos outside. You don’t have access to your cab becasue you blocked it off so now you have to go outside and put yourself in danger to be able to drive off. No thank you! Sorry if I’ve scared you.
I’m not saying you have to have a walk through but a simple escpape hatch in your bulk head wall will do the job.

7. Toilet
Based on my experiene living in campervans with and without a toilet I can confirm, life is so much easier with a toilet.
When I lived in my Vauxhall Vivaro, I opted for no toilet. After a few weeks, I got a shewee so I had the option to go for a number 1 in private and not have to go outside in the dark. You know what, it is actually a great bit of equipment. Well, until you pop it on the side, forget about it and start driving!
Now I have a composting toilet which in my opinion is the best option, as it’s much easier to dispose of vs a chemical toilet. Anyway, I digress, make space for a toilet, especially if you’re going to be living in your van full time.
I have the Kildwick MiniLoo composting toilet but you can also get the MicroLoo version, which is great for tiny campervans. I included it in our Caddy Maxi campervan build.


8. A way to shower
Having a way to shower in or outside of your campervan is another must for me.
This could be as simple as a bucket and cup or a plumbed in shower. Again, I’ve been lucky enough to have experienced all and in my opinion a full plumbed in shower isn’t neccessary, it uses alot more water and can be complex to fit for those who are learning to convert a van as they go.
In my van, I have a wet room and use a camping shower. In Sam’s van, we have a make shift shower set up which you can read all about here.
We love using a portable camping shower as we can use it in or outdoors, have a seperate supply of water for our showers and if we want hot water, we can mix in 2lt of boiled water.
Sometimes simplicity is key in a van conversion.

9. Easily accessible switches
When designing a van build, comfort, practicality and aethetics are what we need to think about. Having accessible switches falls under the practical side but it isn’t always the best for aesthetics. In my opinion, sometimes practicality needs to come first.
First up, light switches, I think it’s best to have one right at the door. If you go into your van at night, you don’t want to be thumbling around to find the switch. Another mistake I’ve seen people make, is having their tap switch inside the kitchen cupboard. When your hands are dirty, you don’t want to be opening cupboard doors to turn your tap on.
Then there are heater switches, for those who use propex, you don’t get a fob to turn it on or off from the bed. I made a mistake positioning our switch out of reach from the bed. So when it’s cold in the morning, one of us has to get out to turn it on. Tip, put the heater switch near your bed!

More van build blog posts
Thanks so much for reading my blog post!
Join me on the road over on Youtube, Instagram and TikTok
Shop eBooks and Van Builds
Please note, some of the links above are affiliate links, therefore if you decide to make a purchase through them I will earn a commission at no extra cost to you. I feel strongly about only recommending products I have used and believe are of high quality! Thanks in advance for using my links!